A dear friend of mine got married this month. She is such a sweet person! In her search for a wedding dress, her budget didn't allow for the dress she really wanted, so she settled for a strapless, tea-length dress. But, strapless wasn't going to work for her so she gave me a call. I had helped her with prom dresses before and was more than happy to help out with her wedding dress. I don't have a "before" picture, but just imagine the dress below being strapless and sans the center belt detail.

I have done this before to strapless dresses and have found that its more comfortable if the fabric has some stretch to it. If not, then it makes it really hard to move around and lift your arms. We were lucky that the only stretch "lacey" fabric that JoAnn's carried in a light cream color was exactly what she wanted! We also picked up a lightweight jersey as lining. Since we were shortening the overall length, I used the excess fabric to make bias trim for the neckline and sleeve edges. I also added some small beads to match the sparkle of the belted waistband.
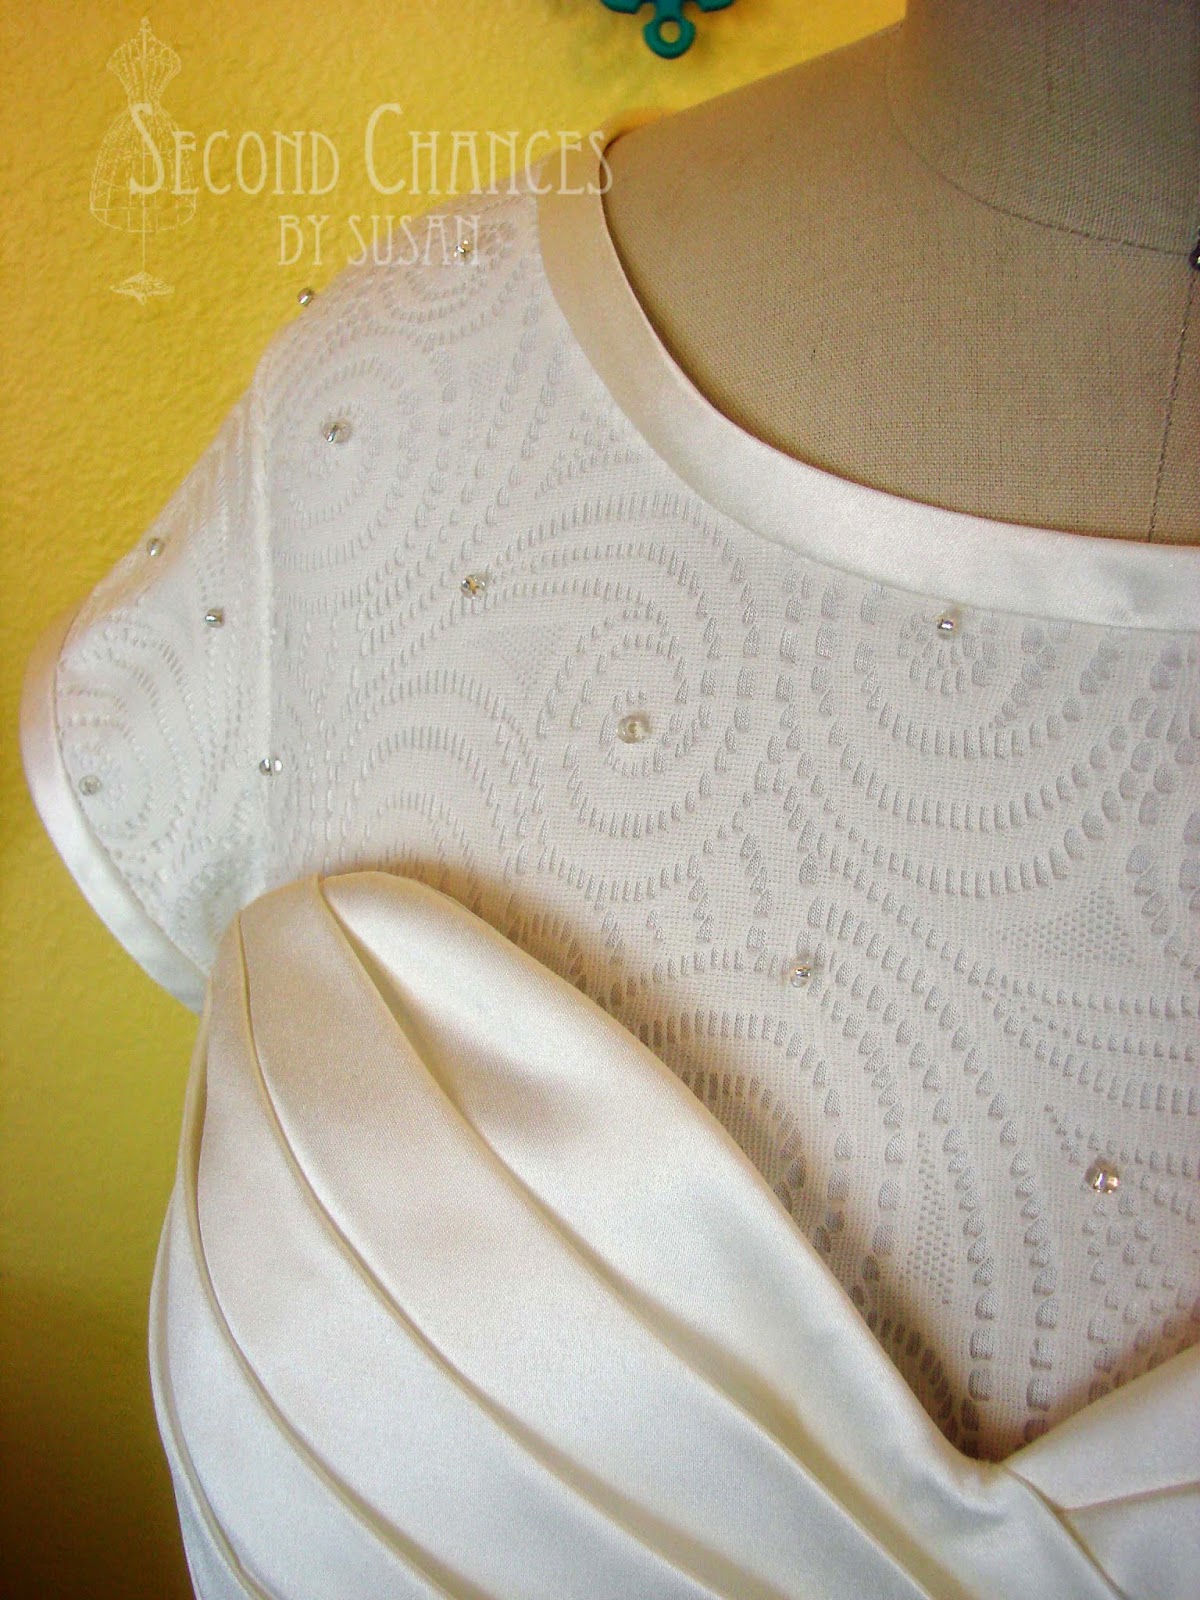
The "modest"ifying is really like taking a fancy t-shirt, cutting away the top of it and attaching it to the lining of the bodice. In this case, though, we didn't have a fancy t-shirt available and had to start from scratch. We also had to do a bit of other alterations which mandated us cutting the belt, leaving an unsightly gap at the front of the dress. We could have allowed the gap to be in the back and covered it with a bow, but that wasn't exactly what she wanted. So, I picked up some ribbon and a rhinestone brooch, along with a couple of buttons from my stash and covered the gap.

Since I didn't want to hassle with putting in a new zipper, I left the original one in place and closed the new back with loops and pearl buttons (also in my stash.) If you are lucky enough to find a fancy t-shirt that matches your dress, you would need to cut the back of the t-shirt and add a facing to allow for the loops and buttons.

I was a bit worried about this whole project. She was only in town for one weekend about three weeks before her wedding, and we couldn't get back together until the day before the big event. That meant that I had to be precise with my measurements and hope that everything would fit as planned. Lucky for us, everything went perfectly and she was so excited. Congratulations to the two of them...they are so cute together!


It's gorgeous, you are a master seamstress, the binding around the top and the belt are perfect, great job!!!
ReplyDeleteCarol
Thanks Carol! The process was a bit stressful, but in the end the bride was happy and that's what counts!
DeleteWhat a nice job, Susan; I especially like how you made the belt detail at the waistline - it is just right! Those two look very happy :)
ReplyDeleteThanks Jenny! As I mentioned in the post, the belt detail was needed because of an alteration we had to do. But, it all worked out. And, they are a VERY happy couple!
DeleteLooks amazing. She looks fab in the outfit. Great job making the bride happy
ReplyDeleteVery clever alterations, Susan and a great idea to use the excess fabric as bias. You were so lucky to find bone lace that matched. The bride looks lovely!!!
ReplyDeleteFeatured today, Susan...
DeleteThanks Pam! And, thanks for the feature! I will pass the "lovely" compliment onto the bride!
DeleteHopping over from your feature at Threading My Way... WOW! What a beautiful transformation! The bride is stunning and looks so happy! -Marci @ Stone Cottage Adventures
ReplyDeleteThanks Marci! I'm just relieved that the bride was happy with the transformation. She is a beautiful bride, though, inside and out!
DeleteWhat a terrific refashion/"Modest"ifying (love your word!!!) job you have done. I have also done a bunch of dresses similar or prom/dance dresses to make them more modest. I never thought about using a t-shirt or similar shirt to do this. Great idea.... and so much more simple then starting from scratch... although, I'm sure it was also an added chore (but from the heart) to do all the beautiful extra's. Lovely job... I will file this away for future references.Thanks for sharing. She looks wonderful, and just think... you made her day!
ReplyDeleteSorry didn't realize my mistake until after I published the comment. I mis read thinking that you purchased a top and then went from there. Sorry.... beautiful job... and beautiful work.
ReplyDeleteThanks Jean, and no problem about misreading the post! You could certainly use a ready-made t-shirt and get the same results. I would have if I could have found one to match!
ReplyDelete