Aug 29, 2011

2 pillowcases + 1 blouse = 1 cute dress!

Question:  What do you get when you combine two vintage pillow cases with one cute blouse?  Answer:  A super cute, super easy dress!


It was as easy as cutting off the blouse, stitching on the pillowcases, and threading through some elastic.  You can see the tutorial here.  I could have stopped at that point, but the neckline was a little too open for me so I added ruffles to each side using the leftover blouse fabric.  I also decided to make a bright yellow belt with a big fabric flower to top it off.


I was lucky to find some matching shoes at Goodwill for half price!  In fact, the total breakdown is this:

2 pillowcase @ 1.99
1 blouse  @ 2.49
belt supplies @ 4.20
shoes @ 3.50
free bracelet

Total for complete outfit = $12.18...not too bad!


I've always loved the color yellow.  In fact, growing up in the 70's my bedroom was decorated with yellow and orange...so bright and cheery!  Oh the memories...bright orange shag carpet, yellow walls, mushroom lamp, troll doll collection to die for, anything to do with the sun, and the scent of Love's Fresh Lemon Cologne...so yummy!


Linking to these great parties!

Featured on:
Sugar Bee Crafts
Sew Woodsy
Thrifty 101

This dress featured in...


Aug 26, 2011

UPrinting Giveaway...My Very First!

Sorry, this giveaway is now closed!


So I guess I'm official now...I'm offering my very first giveaway!


UPrinting.com is an online, eco friendly printing company specializing in brochures, postcards, letterhead, canvas printing, calendars, greeting cards, business cards, you name it (even door hangers!)  They are giving away to one of my lucky readers a custom brochure printing package.  What would you do with your very own custom brochures?  Well, here are a few ideas that could really benefit from this kind of service...


An awesome party
A new business
A current business
Your next family reunion
The birth of a child (how cool would it be to announce this occasion with a full, double-sided brochure!)
A fund-raiser
A church activity
A school event


Their site is easy to maneuver.  They offer brochure templates to create your brochure online (or upload your own design.)  You can also choose from a variety of fonts, folds, and finishes.  They even show you samples to get your creative juices flowing!


The possibilities are really endless, so here is what you can win:

50 pcs Brochure printing for One (1) Winner
8.5" x 11"
100lb Paper Gloss
With Folding (Half Fold, Trifold/Letterfold, Z-Fold, Roll Fold, Accordion Fold),
Outside and Inside Printing
2 Business Days Turnaround
*Free shipping
Restriction: Limited to *US residents 18 years old and above only

To enter:
 Simply leave a comment stating what you would do with your custom brochures.  Make sure your email address is available so that I can notify you in the event that you win.

For additional entries, follow my blog and leave a separate entry stating so.


Giveaway ends Wednesday, August 31st 11:59pm CST.

One random winner will be announced September 1st!

If you have already won the same print giveaway from UPrinting in the past six months, please be advised that I will have to choose a new winner.

Disclaimer: This giveaway is sponsored by UPrinting and I will receive brochure printing services for hosting. Visit UPrinting.com for more information about brochures and available brochure templates.


Good Luck!


Aug 10, 2011

Repurposed Thrift Store Mirror


I found this great mirror the other day at a thrift store for $6.99.  I loved the shape and the design, but I wasn't crazy about the gold color.  But, that's what spray paint is for, right?  


So, I masked off the mirror and began to paint.  I started with an aqua color, then added in some lime green.  I already liked the effect of the two-tone paint, but my family room has a lot of dark chocolate brown decor and I wanted it to fit right in.  So... 


After it was dry, I painted over the top with a walnut colored gel stain—making sure to get it in all the little crevices.  Then I took a dry rag and wiped off the excess stain.  Note: The following picture is before I wiped it off! 


It now hangs in my family room and I love it!


Featured on:

Aug 8, 2011

Girl's Camp Crafts

I just returned from Girl's Camp where I had the privilege of helping with crafts.  I have been to camp for 17 years now as a leader, but this is my first time working with the crafts.  Thanks to all the wonderful ideas on the internet, we were able to do some awesome crafts with the girls!  So here goes...

First up were these wooden plaques with vinyl lettering.  My friend over at Vinyl Craft Lettering provided us with two different fonts and colors.  I cut the boards 31/4" x 18" from MDF, then routered the edges and drilled the holes.  The girls painted them with their choice of color—some even doing multi colors, splatters, flowers, borders, etc. They then applied the vinyl lettering and added the wire hanger.  Just make sure the paint is good and dry before applying the vinyl.  Simple and successful!


We also made no-sew braided headbands that day.  I found this great tutorial over at sugarbeecrafts.com....GENIUS!  The girls LOVED this craft.  They made them with flowers and without.  In fact, they continued making these throughout the week!


On day two, we made duct tape purses.  Anything with duct tape is always a big hit!  In fact, the adults wanted to make them, so we did a late night crafting session—which was great in helping us work out the bugs before teaching them to the girls!  I found this great tutorial at allthingsthrifty.com.  I loved the use of fabric for the interior (it was cute and cut down on the amount of duct tape used.)  We started with a piece of fabric that measured 9" x 18".  The boxed corners at the bottom really gave them shape!  Our budget didn't allow for cording and grommets for the handles, so we used fabric and duct tape.  All we did was lay a 14" strip of duct tape sticky side up, and then placed about a 1" strip of fabric down the center (usually the same fabric as the interior.)  Then the duct tape was folded about 1/4" over the edges of the fabric.  We made two of these for the handles.  Here are the creative purses that some of our leaders crafted.  They are a perfect size for lunches, scriptures, or water bottles and necessities! 

UPDATE 4/28/2013:  If you would like to view a step-by-step tutorial of a simple, fabric-lined duct tape purse, visit my youtube channel.  Become a subscriber so you can be informed when I add new videos!  Here's the link:


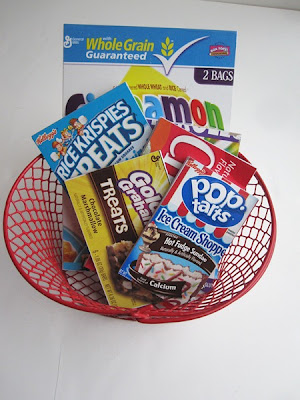
On the third day, we made notepads from cereal boxes.  I found the idea at infarrantlycreative.net.  I didn't get a picture of the ones we made, but this was the idea...


We also made emergency purse kits from Altoid tins.  This was a project I posted earlier on my blog.  These really come in handy.  One of the girls that had made one originally with me says that she uses it ALL the time!

UPDATE:
If you would like to view a video tutorial on how to make these little kits covered with duct tape instead of paper and mod podge (much easier), visit my youtube channel and take a gander.  Here's the link:


http://youtu.be/TGh-zbTOosk

Become a subscriber so you don't miss out on any future videos!


All in all, I'd say that craft time was pretty successful this year.  Now we have a whole year to scour the blogs and find cute things for next year!


Lisa and myself, a.k.a "Crafty Ladies!"