Showing posts with label parties. Show all posts

Oct 31, 2018

Harvest Carnival 2018

Every year our church puts on a Harvest Festival with a chili feed, costume parade, and indoor trick-or-treating for the kids.  Most of the rooms have an activity, or game for the kids to do.  This year, we went with a pirate theme.  I had such a blast coming up with ideas for the room.  Of course, much to my husband's dismay, it means more props stored in the barn!

Just outside the room, the guests were greeted with a "BEWARE" sign, and a poster that would determine their pirate name.  I found the graphic on the internet and printed it at a local print shop.  The pirate mask came from the dollar store.


Sep 13, 2018

Girl's Camp 2018 - The Bead Table


During free time, the girls can pay me a visit and collect the beads they have earned so far.  I like to make the bead table a fun place to visit.  With this year's Alice in Wonderland theme, and since we as adults were the Mad Hatters, I chose a tea party themed table.

Sep 11, 2018

Girl's Camp 2018 - The Campsite

This year was my 23rd year at Girl's Camp.  I now serve as the "Bead Specialist" and love it!  Our theme this year was an Alice in Wonderland theme, based on a quote by the late Pres. Thomas S. Monson, "Choose the harder right, instead of the easier wrong."  The theme had a great message to it considering all of the choices that the girls are confronted with each day.  It also made for some fun decorations.  I was asked to decorate the campsite for the adult leaders, a.k.a, the Mad Hatters.  It was a fun job!

I was able to reuse this chalkboard sign that I had previously used at our Relief Society Tea Party.  It was perched on a rustic easel that was originally made for my daughter's Romantic Country Wedding.  I love it when I can get double duty out of a prop!

May 8, 2018

Another wedding...five down, three to go!

Recently, our son and his lovely bride were married for time and all eternity in the beautiful Portland LDS temple.  It was a beautiful ceremony and a beautiful day!


Our son, opted to forego the traditional boutonniere and instead made his own using copper pennies.


The flower girl, younger sister of the bride, was a little too excited about her duties.  A repair was needed for her bouquet.


The reception was held back at our local chapel.  As always, decorating for the event provided ample opportunities for DIY's, thrifting, and repurposing!

Mar 26, 2018

The Retro Homemaker

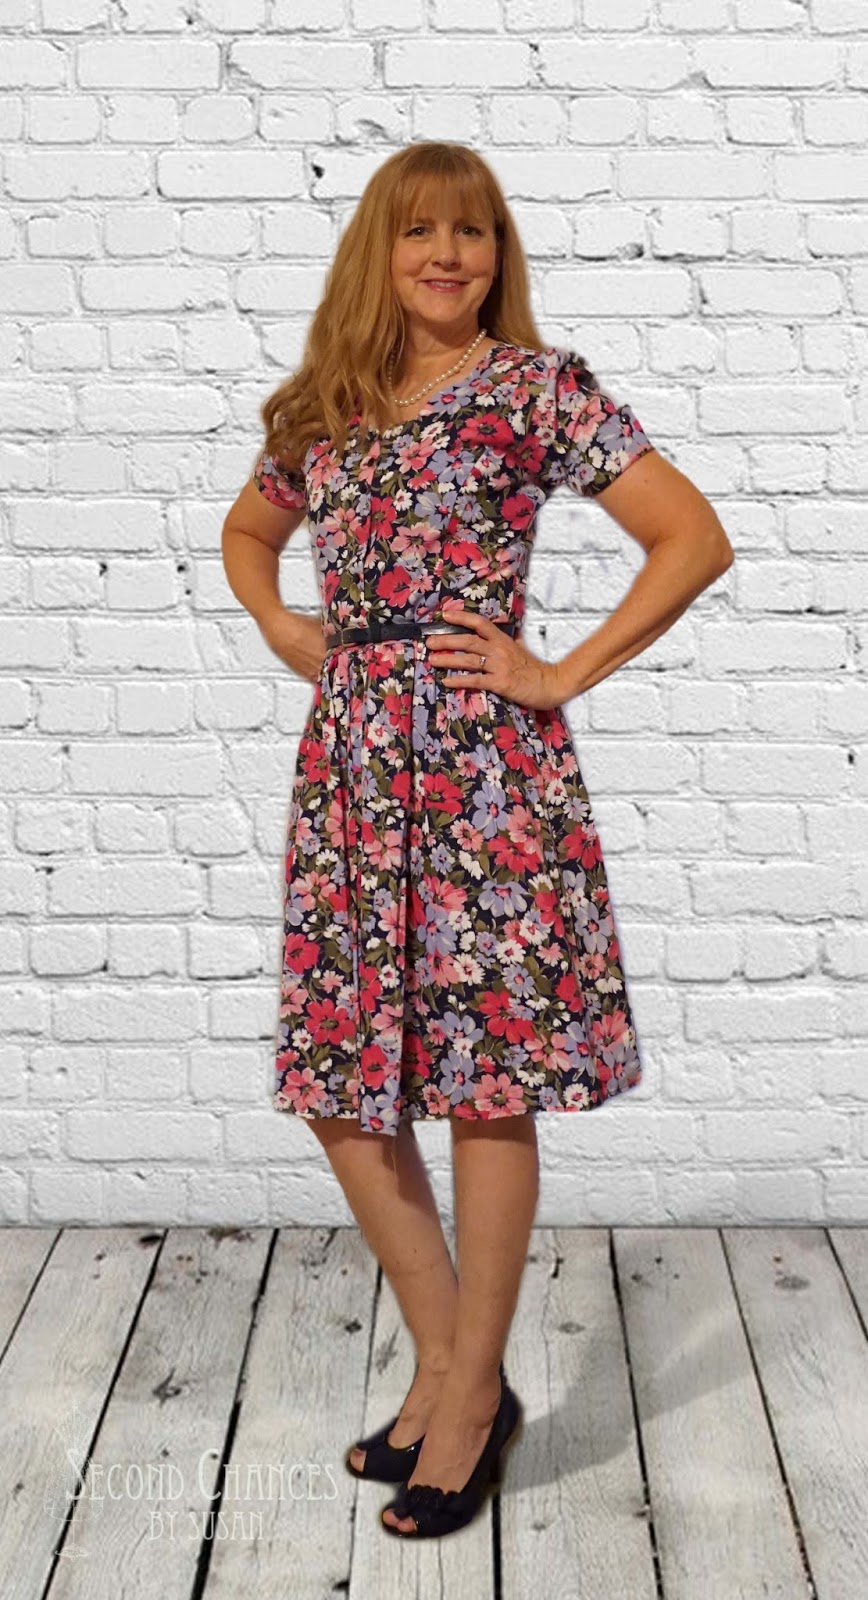
Here's another dress from my stash of 1970's era dresses that my mom wore back in the day.  For the most part, I liked the dress.  I just wanted to tweak it a little and make it a little more retro.


I cut it at the waist and reattached the skirt to get rid of the dropped waist.


The sleeves were a bit too long and full.  I detached the upper gathered part of the sleeve and trimmed away the excess.  I then re-gathered the top edge and stitched it back together.  I cut the sleeves shorter and reattached the cuff detail.  


It wasn't a huge refashion, but now the dress was more in line with a retro themed party.

Aug 7, 2017

A baby shower...with a touch of vintage Disney!

We are anxiously awaiting the birth of our eleventh grandchild, a little girl.  My daughter's friends gave her a shower and I was happy to help with the decorations.  The theme was vintage Disney.  We had fun collecting storybooks from thrift stores and using them for decorations.  I was also able to recycle some of the decorations I had used for the Mad Hatter tea party from last year.  It was a beautiful shower in her friend's backyard.

My daughter found this beautiful IKEA tray at a thrift store for only $3!  I just cut her daughter's name with my Cricut and taped it in place.  


Apr 8, 2017

A Mary Poppins Party

The women's organization of our church just celebrated their 175th anniversary!  To celebrate, we decided to throw a Mary Poppins-themed party.  We decided that there were many life lessons that could be learned from Mary Poppins in helping us to become "practically perfect in every way."

For the invitations, I downloaded an image from the internet and added the party details.  I would reference a source, but to be honest, this image is widely available and I can't remember which site I actually got it from.  I also made matching posters.


Jan 10, 2017

A Cowboy Christmas

This year for our church Christmas party, we decided (actually, I strongly lobbied) to do a Cowboy Christmas party.  It had me scouring the thrift shops for cowboy boots, 
hats, blankets, wooden crates, pots and pans, and anything else that seemed to fit the theme.

I hope y'all have fun viewing the pictures from the event!

To start, I downloaded various clipart from the web and put together an invitation using photoshop.


The lettering for the welcome sign was cut using my Cricut.  It was displayed on a rustic easel I used previously at my daughter's country wedding.  A few extra props rounded out the scene.

Apr 4, 2016

Mushrooms

These cute mushrooms added some fun details to a recent Mad Hatter tea party.  With a few supplies from the dollar store, and probably things you already have on hand, you can make these fairly simply.


To make your mushrooms, gather the following supplies:

plastic cups
plastic bowls
decorative napkins
mod podge
spray paint
brown acrylic paint
foam brush
small paint brush
E-6000 glue (or similar)


Begin by covering your cups and bowls with a layer of cream or white spray paint.


Next, use your foam brush to cover a section of the bowl with mod podge and layer torn pieces of decorative napkins in place.  Continue the process a section at a time.  After you have covered the entire area with napkins, paint a layer of mod podge over the top.  Repeat the process with the stem of the mushroom.  If your napkins have fun details, like butterflies, layer those on top with mod podge.

Once dry, glue the mushroom cap to the stem using E-6000, or similar.  

If desired, water down the brown paint and brush it randomly over the entire mushroom.  For added depth, darken the edges of the mushroom cap and/or the base of the stem with the paint.

And that's it!


I like to link to these great parties!

A Mad Hatter Tea Party

Recently, our Relief Society (our church's women's organization) celebrated it's 174th birthday.  We decided to celebrate the occasion with a Mad Hatter tea party theme, although no actual tea was served!  As with most activities that I decorate for, it requires scouring the thrift shops.  I can now say that I have a pretty good collection of tea pots, tea cups, and saucers!  I also added to my collection of clocks, linens, doilies, and dishes!  Everyone was encouraged to wear a fun or fanciful hat.  After enjoying a light dinner, we watched a video on the history of the Relief Society, then enjoyed the "Parade of Hats,"  where we enjoyed listening to several women share personal stories of some of the many hats they wear in their daily life.  It was a wonderful event!

The food table was filled with chicken salad sliders, salad and toppings, fruit, and desserts.


The center of the food table was decorated with a variety of items.


We covered the rolling chalkboards with quilts to make a backdrop for the speakers.  The table to the left displayed the hats that were discussed by each of the women.


I reused a chalkboard from my daughter's country wedding and added a quote from Alice in Wonderland.  I firmly believe that, as women, and with the help of the Lord, we can do impossible things!


We covered each table with several layers of mismatched linens, fabrics, doilies, and/or quilts. 

Each table centerpiece was an eclectic grouping of found items.  I really love the teapot clock that I found at a thrift store!


Several months ago I came across quite a stack of Reader's Digest books with decorative covers.  The books came in handy for the centerpieces, providing not only color and design, but height for some of the items.  

We purposely mismatched the dishes since it was a Mad Hatter tea party!


I also found seven pots of mounded roses at a thrift shop for $2 a piece.  They were a great addition!


I made some mushrooms from cups, bowls, paper napkins, and mod podge...which I will address in a future post.


I printed some Queen of Hearts cards and we tucked them into the flower pots.


A table of hats was placed at the entrance for those who forgot to wear one.


We strung some white lights and paper buntings (left over from this wedding) to help make the cultural hall more festive.


It was a fun event!  The highlight was listening to the different women speak about the various hats they wear...so much service being performed by these lovely ladies!

I like to link to these great parties!


Feb 25, 2016

Feelin' Groovy!

In celebration of Valentine's Day, our church decided to put on a dance for the adults.  I was invited to help with the planning.  The idea was to keep it simple (mainly just food and music), and for the most part it was simple, except for a few fun additions.

After the initial invitation to help, I immediately began to think of possible themes for the dance, especially a theme that could include dressing the part.  I was drawn to a decades dance, primarily the 1960's!  And so it began, my mind started racing with all the possibilities.  Of course, there was a budget to keep to, so most of my ideas were going to have to be DIY and repurposed.

We were going to need the basics, such as lighting, refreshment table, centerpieces, wall decor, etc. But, I also was thinking of adding in some fun activities and a photo op scene.  I hope you enjoy what I came up with as much as I enjoyed creating it!

When the guests arrived, they were transported back in time with this retro living room.


I replaced the traditional foyer furniture with four matching retro chairs that just happened to be at the church already.  I brought in a mod looking rug from my son's bedroom, a lamp from my family room, and a aqua painted TV tray from my game room.


The whole retro living room idea sprang up from the idea of showing some opening and closing credits from a variety of 60's TV shows.  We could have just watched them on a regular TV that sat atop a roll around cart, but where's the fun in that?  So I figured I needed to change things up a bit and make a retro TV.  

I picked up a piece of 1/2" thick cardboard from an appliance store.  I drafted a design, cut it out and built a box.  I covered the whole thing with blonde woodgrain contact paper (thrifted who knows how long ago!) and edged it with real wood trim.  I cut two oval openings at the lower front of the TV and covered them with burlap for the speakers.  I picked up four tapered legs from a reuse-it store, covered them with contact paper and attached them.  It took a bit of searching, but I finally found a couple of old TV knobs from a TV repair shop.  The antennae is made from knitting needles.  

The back of the TV was left open so that I could get my computer monitor in and out easily.  The monitor sat inside on a stand built to the right height of the TV front opening.  We just spliced a bunch of old TV shows together and looped them.  They continued to play throughout the night.  I kept my wireless keyboard and mouse in the cute little retro suitcase to the right for easy access.  A lot of memories came flooding back while listening to the themes from shows like The Monkees, Get Smart, Bewitched, The Flintstones, The Beverly Hillbillies, The Andy Griffith Show, Gilligan's Island, etc.  There were a few commercials from the 60's thrown in for fun!


I couldn't leave the walls empty, so I brought a few vases from home to add to the shelves, and hung a mirror that I made from free paint sticks, a round metal decorative wall hanging, bamboo skewers, and small round mirrors.  The retro phone came from my sewing studio.


To finish off the scene, I made a retro coffee table from plywood, the same blonde wood grain contact paper as the TV, and large metal shelf brackets for legs.  I topped it off with some vintage magazines from the 60's and a vintage candy dish.


I was really happy with the way the whole scene came together.

Moving on to the main dance hall, the guests passed through a beaded curtain flanked with polka dot sheers, all thrifted.  I mean, you have to have beads, its the 60's!


The refreshment table was lit with icicle lights covered with the same table skirting I made for three of my kids' wedding receptions.  (Made from free hotel sheets, they have come in handy many times!)  The walls were decorated with lots of paper flowers, smiley faces, and peace signs cut from my Cricut.  We hung outdoor Edison lights I had purchased for my daughter's wedding around the perimeter of the room.


We had a hula hoop contest, which was a hit!


We also played the "Not So" Newlywed Game with some of our church leaders and their wives.


The lamp centerpieces were recycled from a previous church activity that had a Moroccan theme.  I figured they would fit in with the 60's vibe.  The center squares were cut years ago from some hot pink vinyl I picked up at a thrift store.


One of my favorite scenes was the groovy photo op bus.  I used the same 1/2" thick cardboard as the TV to make the bus.  The headlights were parts from a couple of recessed lighting fixtures I picked up from a thrift store.  The fixtures were missing the actual lights, so I glued a small, clear decorative plate to the inside of each to give them the look of real headlights.  The small reflector lights are inset into mason jar rings.  The mirror arms are metal shelf brackets purchased from a reuse-it store.  The license plate was cut from my cricut and actually sports the month and year of the groovy dance.  The whole bus was hand painted and then edged with black duct tape to cover the cut cardboard edges. For inspiration, I enjoyed several hours of music from the 60's as I designed, cut, painted, glued, and taped! 

The ombre-dyed sheets were recycled from the same Moroccan activity as the table lamps.  The palm trees were recycled from a South Seas activity that we had had previously.  Can I just mention how thankful I am that we built a barn this past year with lots of storage space?!


Of course, the whole evening wouldn't be complete without the right outfits.  I was originally going to wear my mod 60's dress from this previous post, but who am I kidding, this was a good excuse to sew and create something new!  My husband, however, was perfectly fine recycling his outfit!

This time I opted for a whole black and white ensemble.  I used this retro influenced Simplicity pattern to make a coat from a thrifted bed sheet I had in my stash.  


I added some black piping to the collar, and a vintage flower brooch.  It went together pretty quickly.


I was going to make the dress also from the pattern until I looked in my refashion closet and pulled out a black and white dress that just needed to be taken in a little.  It had a black strip around the bottom already, but I added some white to really make it stand out.  Plus I had previously thrifted some black and white loafers that matched perfectly, and as a bonus, they were comfortable for dancing!


I picked up a mod necklace from my favorite $2 jewelry shop.  The white with black polka dot earrings came from Goodwill.  And, how fun was it to wear false eyelashes?!


I also thrifted a fun crocheted purse and hat.  And to top it off, some oversize white framed sunglasses.


My adorable parents!  I loved watching them dance together that night...so cute!


And that was our groovy dance....peace out!


I like to link to these great parties!