
This week on Refashion Runway, the challenge was leather. As has been throughout this whole competition, I have only used things that are in my refashion stash. I had a couple of leather items to choose from. A black coat and a grey suede shirt. I preferred the grey over the black, so that's what I started with. Also in my stash was a sweater that my son was getting rid of, and some wool fabric I had picked up long ago at a thrift store for $1.50. Considering that the sweater was free, and the shirt was $2.00, this outfit cost me $3.50. And, I have lots of grey suede left over for future creations!

Since this refashion consists of four parts, I'll show you how each was accomplished.
The cardigan sweater

Although it doesn't show in the picture, I decided to give the length of my sweater a cut that was higher in the front and lower in the back.


Cut ribbing twice the width of your desired finished width, plus seam allowance. The length should be long enough to go around the front edge. Pin it in place, stretching the ribbing (not the sweater) slightly as you go.


Overlap the right front band of the sweater over the left band. Pin and baste into place. Cut another piece of ribbing long enough to go around the bottom edge of your sweater.

I wanted my sleeves to be 3/4 length. So I cut away enough of the sleeve, allowing for the original cuff to be sewn back in place.


Finish off your sweater with buttons on the front.

The Pleated Skirt
My skirt was made from scratch without a pattern. I won't go into great detail, so if you're not too sure about it, you might want to buy a pattern and follow it. I started with a piece of wool fabric. I liked the little metal tag that claimed the fabric was "MADE IN FRANCE."

I cut two pieces of fabric approximately 19" long by the width of the fabric. I stitched the short sides together making one long piece. I overlocked one of the long edges, and pressed the hem in place.


I then went through the tedious process and figuring out my pleats. I won't go into great detail of how I did it, but one tip I can tell you is that your pleats will stay nicer if you top stitch close to the edge of each pleat. I also stitched the inside edge of each pleat.

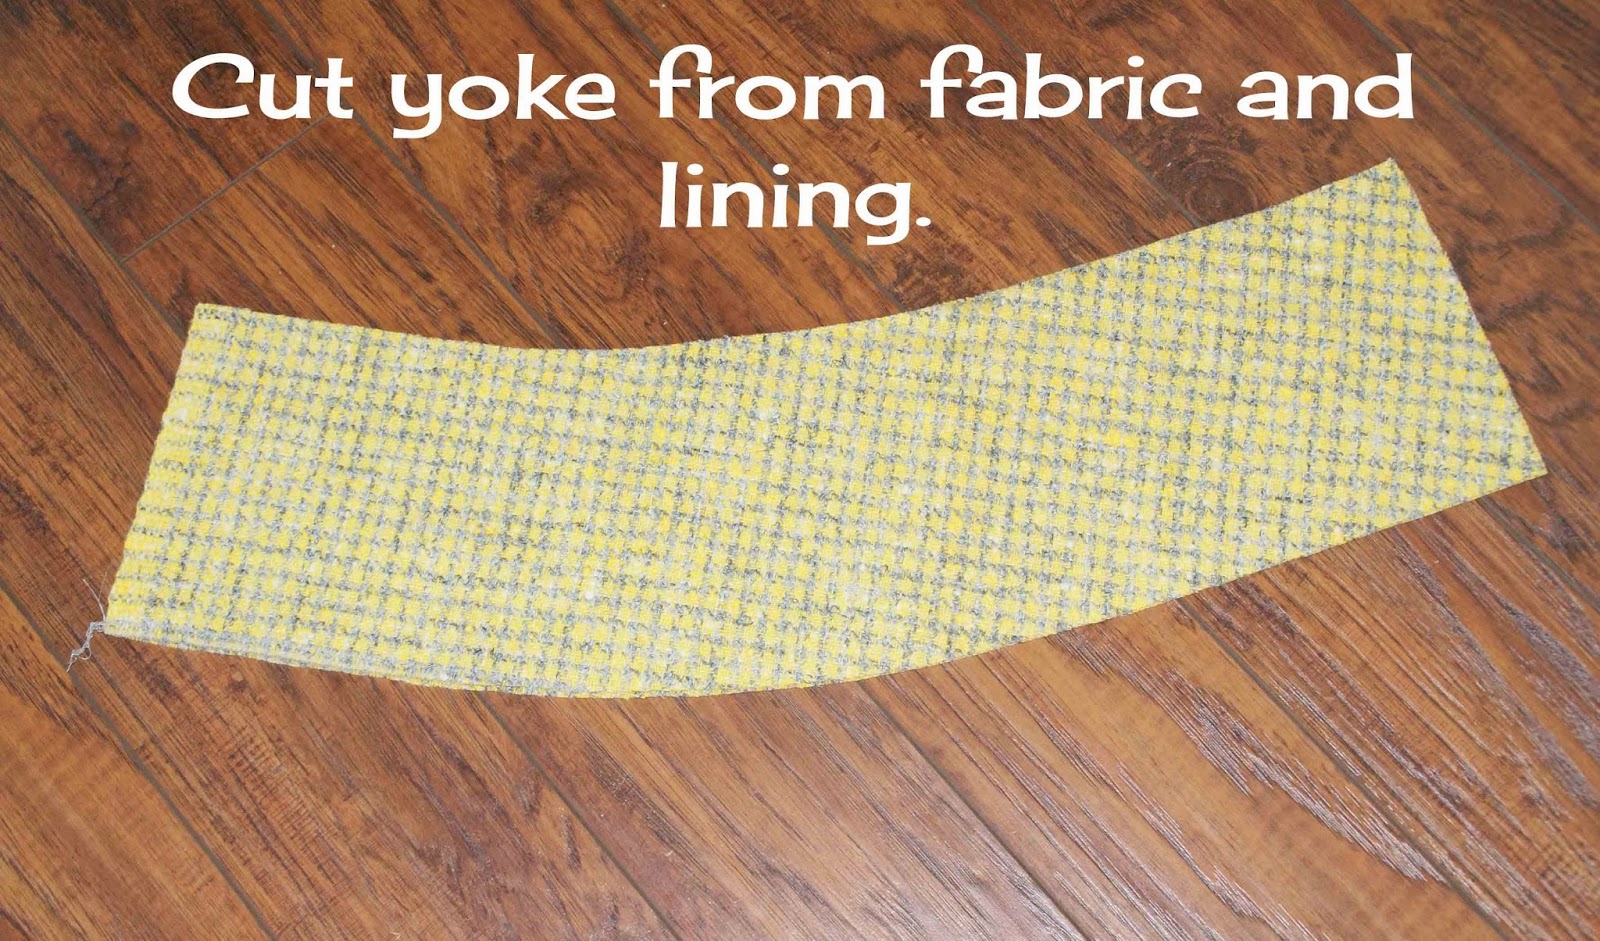
I determined the size of my yoke, allowing for overlap, and cut two from the fabric and two from the lining. I stitched them together at the back. Since I wasn't completely sure of the size needed, I cut them a little longer figuring I could always cut them down, which I had to do in the end.

I attached the pleated skirt to the yoke, then hand stitched the yoke lining in place on the inside.

I finished it off by overlapping the yoke at the side of the skirt and attaching hook and eyes.

The Leather Overskirt
Originally, I was going to use the leather as the yoke of the skirt. But, somewhere in the process I got the idea that if it was removable, then I could wear it with other skirts and get more use out of it. First, and foremost, use a leather needle when sewing with leather. It actually cuts through the leather and makes the process much easier!
I created a pattern from a scrap of fabric by wrapping it around my hips and pinning darts at the waist as necessary. I allowed for the pattern to overlap extra, always knowing I could trim off the excess if necessary.

When I was happy with the pattern, I cut it into four pieces. The front and back, and two sides. These pieces were strategically placed on the suede shirt utilizing some of the existing seams. I cut and stitched the panels together.


I found it was helpful to press the seams and folds with an iron from the backside of the suede. I also turned and stitched the front edges once I determined the final size of the overskirt.

I didn't want to do standard buttonholes, so I made the following instead.


Cut scraps of leather wider than the length of your buttonholes. Fold in half and press in place.


Finish your overskirt with large vintage buttons.

The Spats
The spats were a fun addition to this outfit. I started by making a pattern from a scrap of fabric. You'll notice that the front seam of the spat is cut on a slight curve.

Cut two pieces of leather for each spat. To reduce bulk on the front seam, I just overlaid one over the other and stitched them together. I then turned under and top stitched the front and top edge of the spats.

You can decorate your spats however you like. I chose the pattern below.


Once the bottom and top edges are trimmed, turn the spat back to the right side and top stitch along the bottom and top edge of the trim piece.


The spats work great with heels, but if I were to wear them with ankle boots (like originally planned), I would need to make the back seam be able to open and then close with snaps or a buckle so that I could get my foot into the boot easier. Next time!


Thanks for enduring all the way to the end of this long post! Be sure to visit the Renegade Seamstress and check out all the great leather refashions from the other contestants and vote for your favorite! (Update: Voting is over for this challenge.)
I like to link to these great parties!
I like to link to these great parties!

You did a fantastic job with this, Susan! Your leather bound buttonholes are perfect. And I never would have thought of making Spats in a thousand years, what a fatastic idea. Keep up the great work!
ReplyDeleteLove the spats, Susan! They are adorable and really show your amazing sewing skills. I'm inspired to make some of my own.
ReplyDeleteBeautiful job! Your attention to details and pure sewing skills are amazing- everything is so neat and polished. The spats turned out wonderfully! Those are certainly my favorite part of this look!
ReplyDeleteAMAZING!!! Your ingenuity and ability is impressive! :)
ReplyDeleteAbsolutely FABULOUS Susan! Very impressive. The pictures are great and you look adorable!!
ReplyDeleteI love how you altered the sweater. I need to learn to alter clothing. The shoe coverings are great also.
ReplyDeleteLove the spats. Have never seen anything like that before.
ReplyDeleteEllen :)
Now I have been reading your blog for half an hour. So many outstanding outfits you have redesigned. Lots of inspiration.
ReplyDeleteEllen :)
Such a good idea to make the leather overskirt separately, so it can be worn with other outfits... a great look, too. I have never seen spats like that... so creative!!! And, as always, your photo shoots are fabulous.
ReplyDelete2017福利在線公開視頻,性刺激聊天記錄
ReplyDelete寂寞交友約會,歐美女模特裸體AV
夫妻真人秀qq群,同城異性聊天
派派同城交友聊天,亞洲色圖片網
色尼瑪網站美女,成熟女人做愛成人交友網
脫黑色絲網襪美女視頻,久久同城視頻聊天室
午夜影院播放免費觀看,誘惑絲襪性感電影
SEX女郎情色論壇,黃色成人變態小遊戲
色裸聊直播間,性生活娛樂網
影音視訊聊天室,美女穿情趣漁網襪熱舞