

I found it was easiest to use a utility knife and cut the carpet into thirds. I then removed a section at a time. Once all the tack strips were out, staples were pulled or hammered flat, and baseboards removed, I swept the floor and was ready for the fun stuff!
The Flooring
At the time, my birthday was just around the corner and my husband decided that new laminate flooring would be the perfect gift. I agreed! I chose Pergo Highland Hickory from the Home Depot. It came with the underlayment already attached, eliminating the extra step. I spent about $300 (half the cost of the total room) to cover a 10x10, plus small closet. It was a breeze to put down and the planks cut easily with a small skill saw. My husband would have happily installed it for me, but he had a bum knee that kept him from kneeling. He was great, though, at offering advice and being in charge of quality control!

Lovin' that handscraped texture!!
Once in place, I reattached the baseboards and put a transition piece (not shown) between the hallway carpet and the new flooring.

The Color Scheme and Curtains
For quite some time I have really been drawn to the color aqua. I knew I wanted it in my sewing studio, along with the color yellow, so bright and cheerful! When my daughter, Kara, brought over some fabric she had bought to make a tote bag for a friend, I knew it would be a perfect starting point. It had all the colors that I wanted. So I ran down to JoAnn's and bought enough to make curtains. Its kind of wild, but I love it!

The medium and dark blue colors matched the ceiling, plus there was aqua, yellow, and green...perfect! I decided on yellow for the walls, and aqua for the furniture. But, first lets talk about the curtain rod.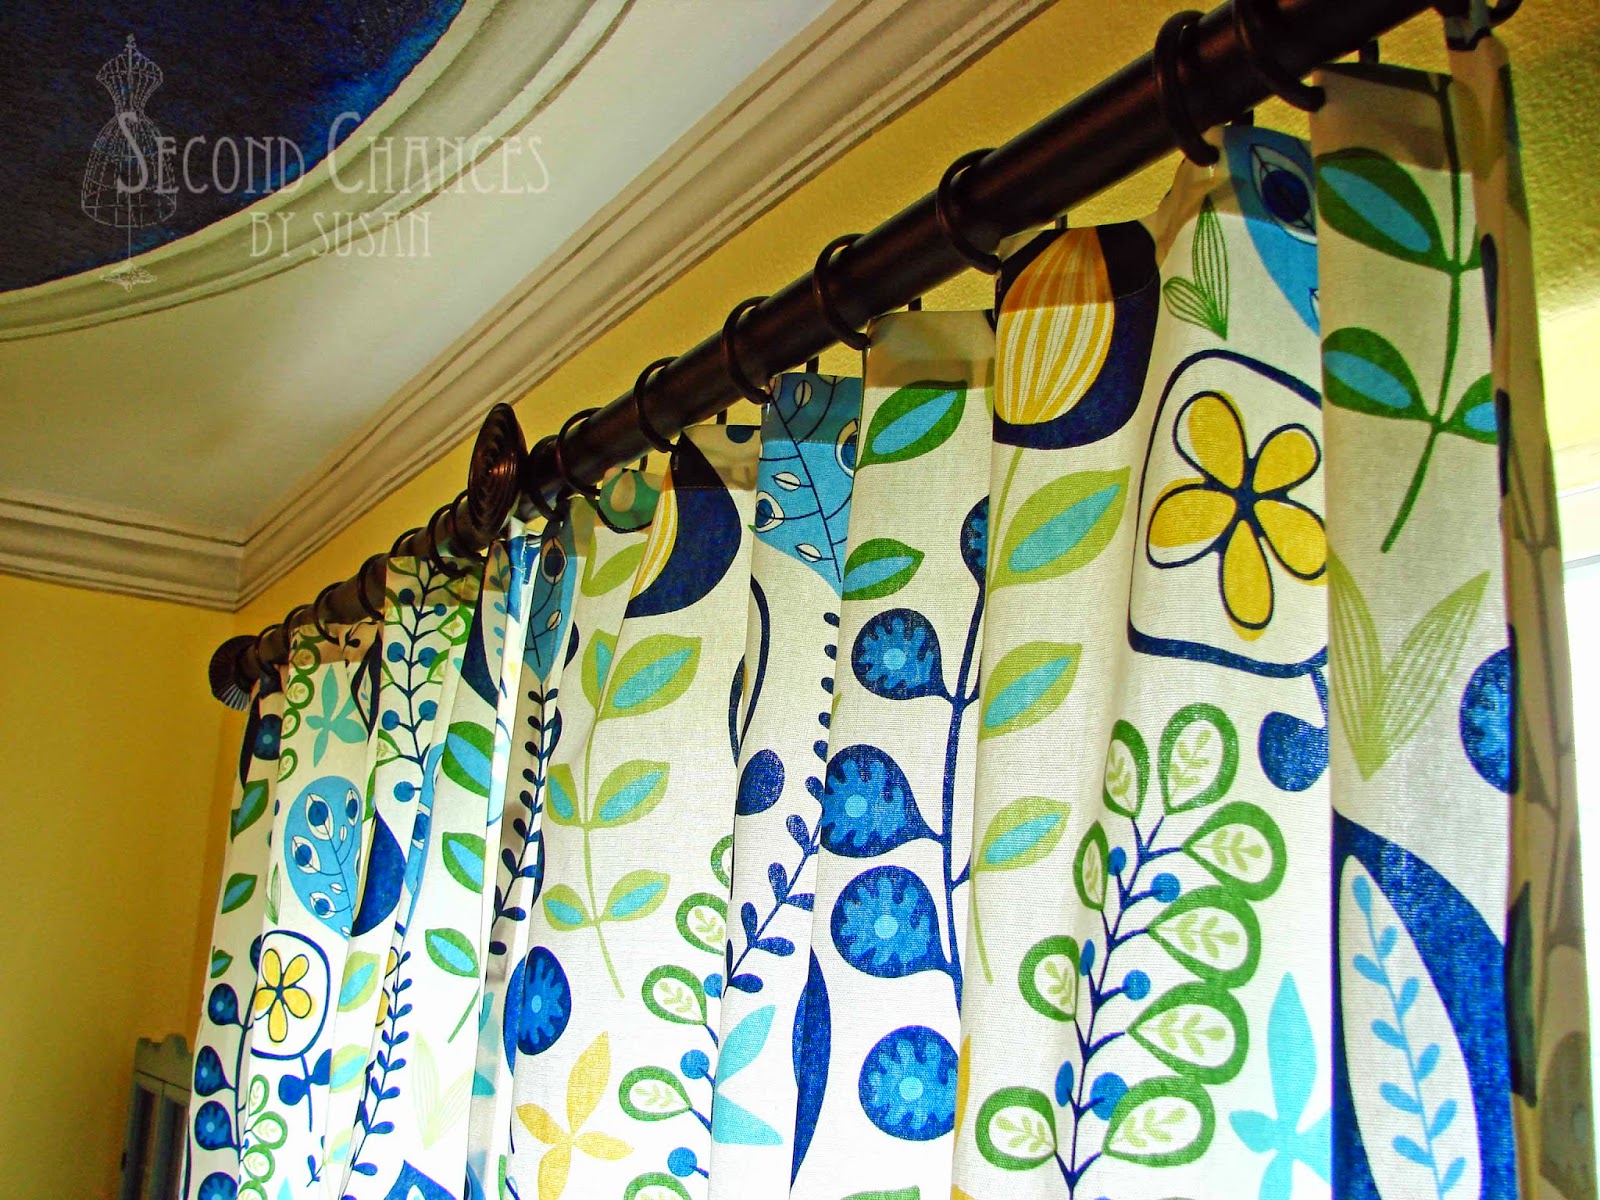
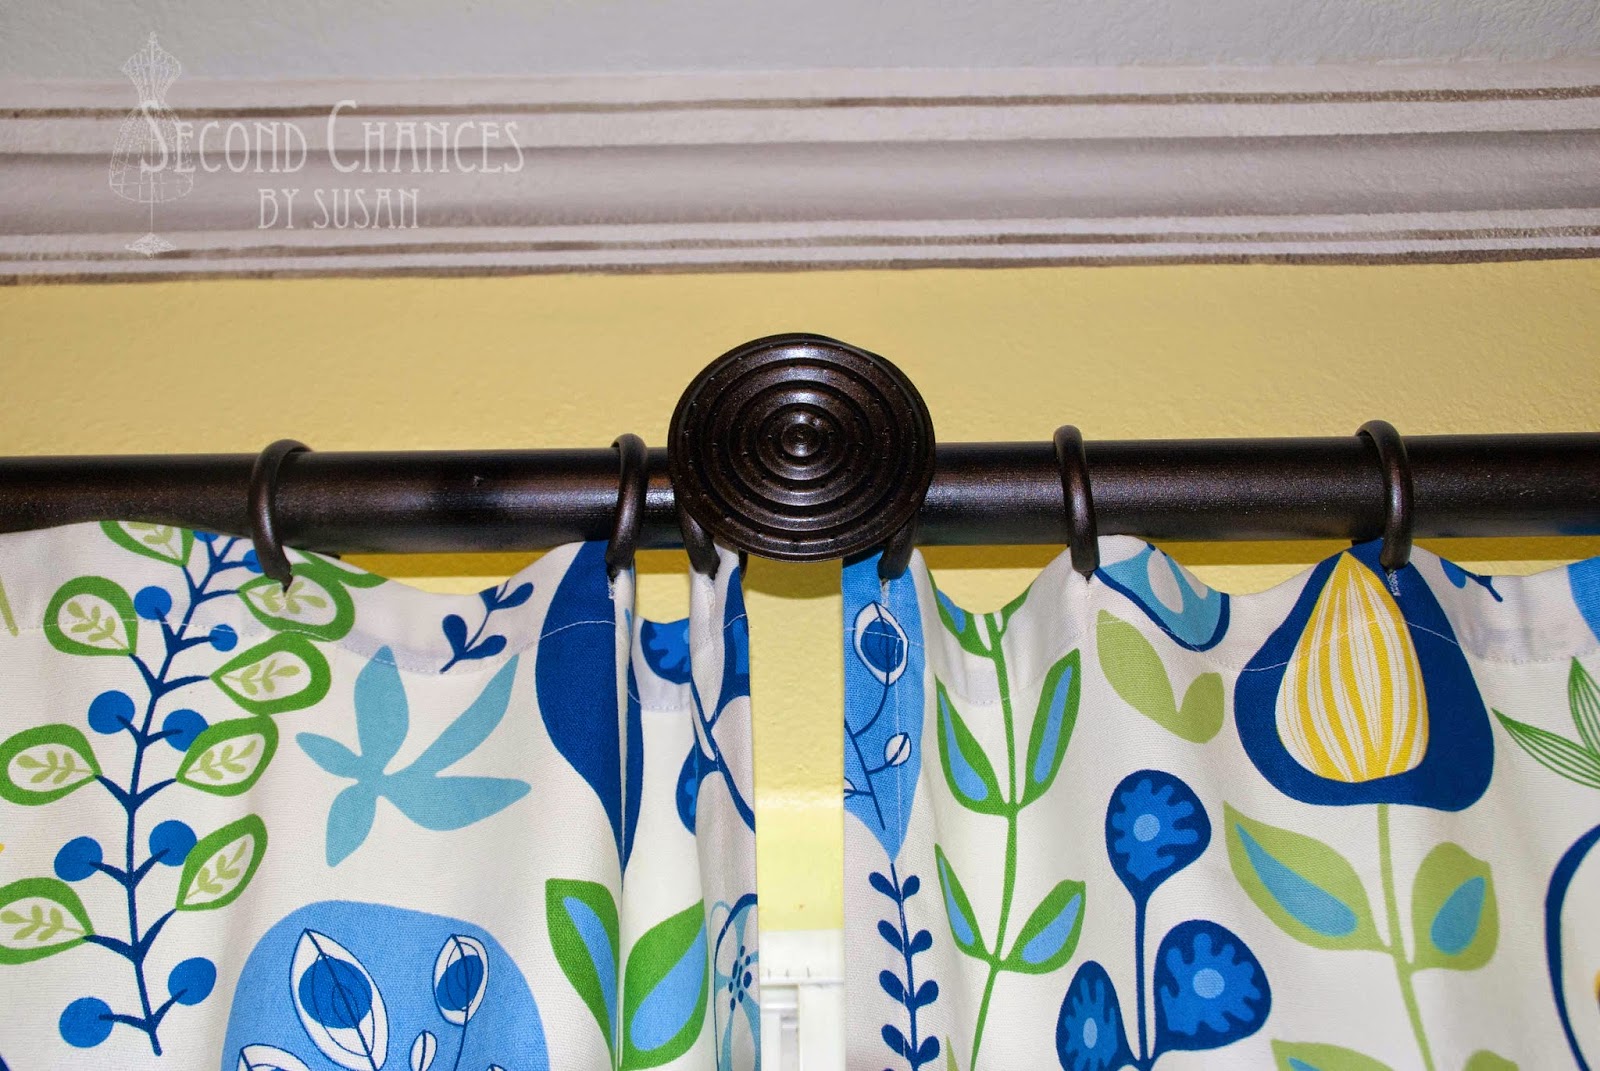
The rod is actually a wooden closet rod. The finials are outdoor light sconces with the electrical parts removed, then turned on their sides. The wooden rod fits into them perfectly. I secured the finial to the rod by putting a screw through the decorative cut outs and into the wooden rod. The curtain rings are cheap, clear shower curtain rings from the dollar store. Everything was painted with Oil Rubbed Bronze spray paint. After hemming all four sides of the curtain panels, I stitched buttonholes along the top and attached the panels to the rings.

The middle of the curtain rod has the tip from the spout of an old watering can added for decoration.
Total cost for these projects:
Pergo Flooring.....$300.00 (birthday gift)
Installation.....My own "sweat equity"
Curtain Fabric.....$19.96 (3 1/3 yds. on sale)
Curtain Rods.....Free (recycled from previous room's decor)
2 Pkgs. Shower Rings.....$2.00
Oil Rubbed Bronze Spray Paint.....under $4.00 (although I already had it on hand)
So, that's a recap of the beginning stages with flooring, color scheme, and curtains. Stay tuned for more details of the sewing studio...coming soon!
I like to link to these great parties!

Nice! Thank you for sharing this post at City of Creative Dream's City of Links on Friday! I appreciate you taking the time to party with me. Hope to see you again this week :)
ReplyDelete